
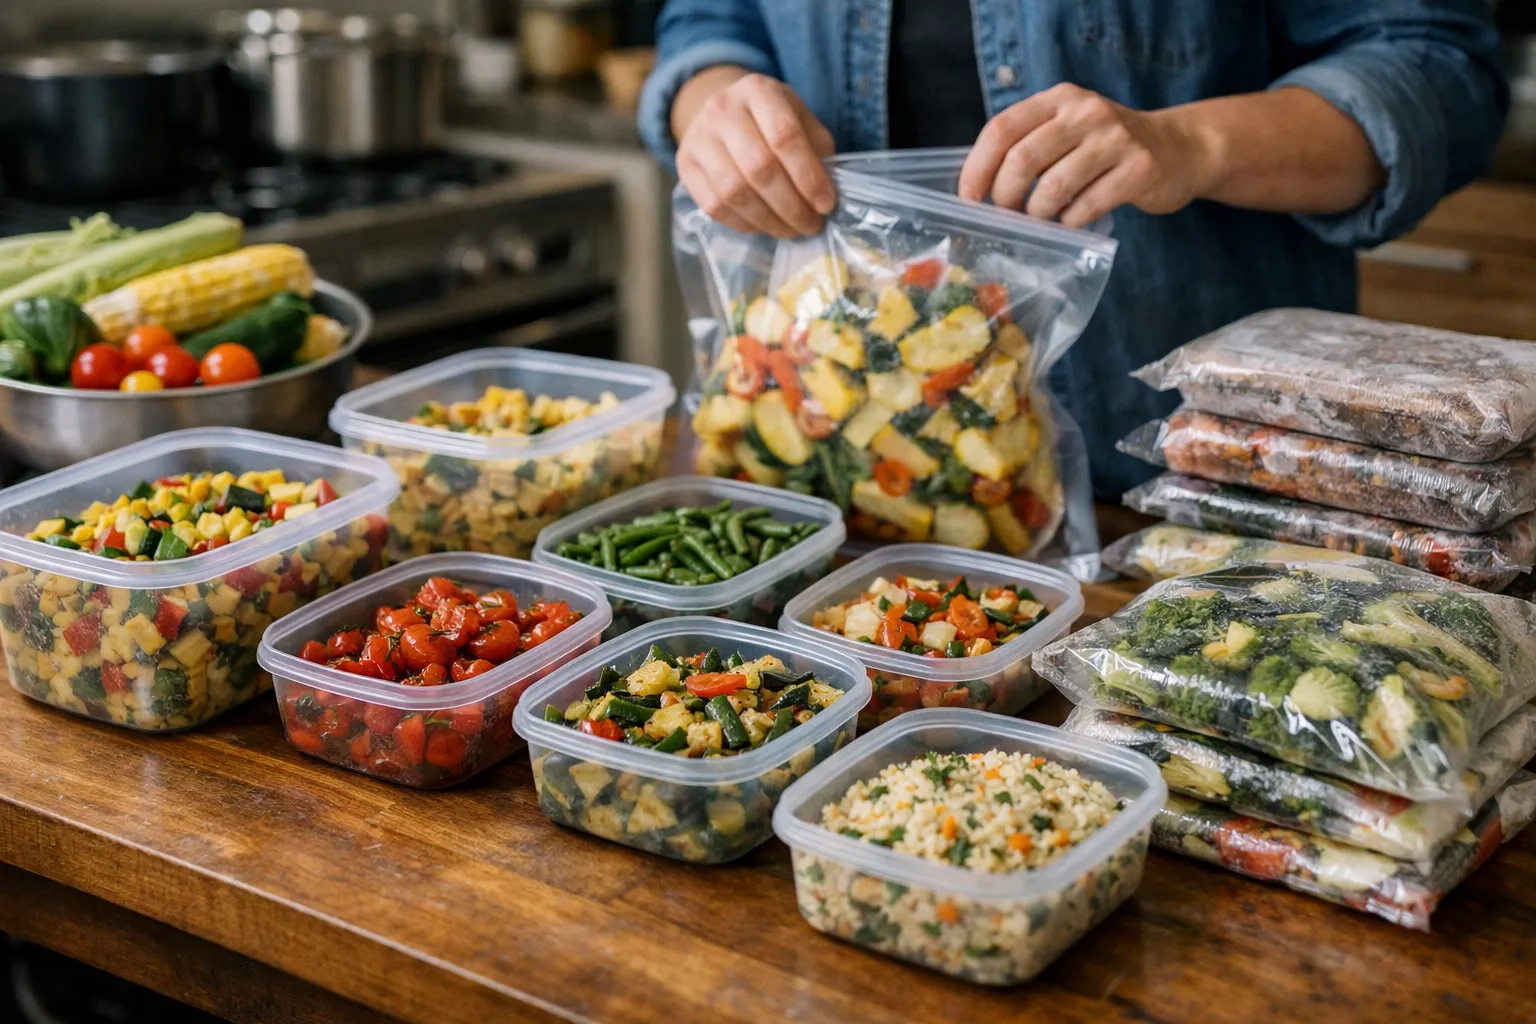
By Dr. Emily Torres — This updated guide (October 2026) shows home cooks and meal planners how to build a two‑week freezer‑first meal plan that showcases summer vegetables (corn, bell peppers, zucchini, green beans, summer squash, eggplant and tomatoes prepared for freezing). You’ll get a clear shopping and prep workflow, verified blanching guidance, packaging and labeling best practices, reheating instructions, and updated 2026 tips—like smart‑freezer features, low‑waste choices, and new home vacuum/sealing options—to keep meals tasty, safe and nutrient‑dense. Research suggests freezing preserves nutrients well when produce is processed at peak ripeness (Rickman et al., 2007; Academy of Nutrition and Dietetics). Always follow food‑safety steps below and check with your clinician if household members are immunocompromised.
Prerequisites & context
Who this is for: home cooks who want to convert abundant summer produce into ready meals that save time, reduce waste and preserve nutrients.
Why this still matters in 2026: grocery prices, seasonal availability and sustainability efforts continue to drive interest in batch freezing. New consumer freezer features (fast‑freeze drawers, Wi‑Fi temperature alerts) and wider availability of reusable silicone and vacuum‑compatible packaging make freezer‑first meal plans more reliable and lower‑waste than a few years ago.
Before you start, make sure you have:
- A freezer that reliably holds 0°F (−18°C) or lower and enough usable space for 14–20 meal portions. If your freezer has a fast‑freeze or quick‑freeze setting, use it when adding large batches to help preserve texture.
- Containers: a mix of 1–3 cup BPA‑free rigid freezer containers, heavy‑duty freezer bags or reusable silicone bags, and (optional) a home vacuum sealer with food‑grade bags. Vacuum sealing extends quality but remember safety basics for cooked items.
- Tools: large stockpot, blanching basket or slotted spoon, large ice bath (bowl + ice), baking sheets, sharp knives, cutting boards, kitchen scale or measuring cups, a freezer thermometer and waterproof labels/marker.
- Knowledge of household needs (allergies, sodium limits). For medical diet questions, consult a registered dietitian or your healthcare provider.
Step 1 — Plan the two‑week template (30–60 minutes)
Why: A simple template reduces decision fatigue and streamlines batch cooking. Build versatile bases that mix‑and‑match across lunches and dinners.
- Choose 4–5 bases to rotate (examples):
- Roasted vegetable medley (eggplant, zucchini, peppers)
- Tomato‑pepper sauce for pastas and shakshuka
- Vegetable curry base (onions, tomatoes, peppers, spices)
- Corn & bean succotash or succotash‑style salad base
- Mixed stir‑fry vegetable packs (green beans, snap peas, sliced zucchini)
- Decide portion sizes: 1–1.5 cups of vegetables as a side; 2–3 cups for a vegetarian main. For two adults eating one freezer meal per day, plan 14 portions; for four people, plan 28 portions.
- Seasoning plan: Freeze bases with minimal salt and no fresh herbs. Finish with acid (lemon, vinegar), salt and fresh herbs when reheating to revive flavor.
- Make a shopping list organized by workflow: items to blanch (green beans, peas, corn), items to roast (eggplant, zucchini, peppers), and items to cook down (tomatoes, onions). Include containers and ice for an efficient session.
Step 2 — Sourcing and selecting summer vegetables
Why: Ripeness at harvest yields the best flavor and nutrition for freezing. Buying in season lowers cost and food miles.
- Where to shop: farmers markets, CSA boxes and grocery stores with fast turnover. For peak flavor, choose produce harvested at peak ripeness—firm, brightly colored vegetables without soft spots.
- Quantity rule of thumb: For 14 portions, plan ~8–10 lb of mixed vegetables total (roasting reduces weight by ~20–30% from moisture loss).
- Tomatoes: freeze best after cooking into sauces or roasting—raw freezing alters texture. Heirloom varieties freeze well once stewed down into a sauce; strain if you prefer a smooth texture.
- Consumer tip (2026): consider buying “seconds” at farmers markets—slightly imperfect produce is usually cheaper and freezes just as well for cooked preparations.
Step 3 — Blanching & pre‑cooking (90–150 minutes)
Why: Blanching inactivates enzymes that degrade color, texture and nutrients; it generally improves frozen texture for beans, broccoli and green peas (National Center for Home Food Preservation — NCHFP).
Use NCHFP blanching times as your baseline and adjust for piece size. If you are at high altitude, follow NCHFP altitude guidance (see NCHFP for exact adjustments).
- Typical blanching times (adjust for size):
- Green beans, asparagus, broccoli florets: 3 minutes
- Sliced carrots: 2–3 minutes
- Peas: 1.5–2 minutes
- Corn kernels (cut from cob): 4 minutes
- Sliced zucchini & summer squash: 1–1.5 minutes (zucchini is the most delicate)
- Roasting‑to‑freeze (peppers, eggplant, tomatoes): roast at 425°F (220°C) until edges brown and moisture reduces. Cool on trays before portioning.
- Bring a large pot of water to a rolling boil; prepare a large ice bath.
- Work in batches: place prepared vegetables in the boiling water for the timed blanch; immediately transfer to the ice bath to stop cooking.
- Drain thoroughly and pat dry—excess water increases freezer ice crystals and damages texture.
Step 4 — Portioning, packaging & sealing (30–60 minutes)
Why: Portioning saves reheating time and prevents refreezing cycles. Proper packaging reduces freezer burn and preserves flavor.
- Cool cooked items to near room temperature quickly—but do not leave out more than 2 hours (1 hour if ambient temperature >90°F/32°C).
- Portion into meal‑sized amounts: mixed dishes 1–2 cups per side portion; 2–3 cups for mains.
- Packing options:
- Freezer bags (laid flat): press out excess air or use a reusable silicone bag; label flat for stacking.
- Rigid freezer containers: leave ½‑inch headspace for liquids; use freezer‑safe lids.
- Vacuum sealing: excellent for long quality retention—especially for sauces and single‑ingredient packs (corn kernels, roasted peppers). Use food‑grade bags and follow manufacturer guidance for hot or warm foods.
- Label each package with contents, date, and reheating suggestion (e.g., “Roasted pepper‑tomato sauce; thaw overnight; simmer 5–7 min”). Include «use‑by» guidance based on quality windows below.
Step 5 — Freezer storage and shelf‑life guidance (2026 best practices)
Why: Food kept at 0°F (−18°C) is safe indefinitely, but quality declines. Newer packaging and sealing options help extend quality life; still, plan to rotate stock for best texture and flavor.
- Quality windows (guideline, USDA/NCHFP):
- Blanched vegetables (single ingredient): best quality 8–12 months.
- Cooked vegetable bases & sauces: best quality 3–6 months (higher fat/dairy shortens this).
- Soups/stews with vegetables: best quality 2–3 months for optimal texture.
- Store smart: use FIFO (first in, first out). Keep a dated inventory list on your freezer door or use a simple app or spreadsheet—many smart freezers now integrate inventory features or pair with kitchen apps.
- Energy tip (2026): when freezing large batches, use a fast‑freeze setting if available, and avoid opening the freezer frequently during the first 24 hours to help the appliance recover temperature quickly.
Step 6 — Thawing & reheating for best texture and safety
Why: Correct thawing preserves both safety and texture.
- Thaw in the refrigerator overnight when possible. Sauces and small portions may be reheated from frozen—heat until internal temperature reaches 165°F (74°C) throughout (USDA/CDC recommendation).
- For stir‑fries: add frozen vegetables directly to a very hot wok or skillet; use high heat so released water evaporates quickly and you regain caramelization.
- Rehydrate roasted vegetables by briefly roasting or broiling after reheating to refresh edges; finish with fresh herbs, acid (lemon or vinegar) and a drizzle of oil to brighten flavors.
Updated 2026 additions — new options and small‑scale tech
What’s new and useful in 2026:
- Smart freezer features: Many mid‑range freezers now include fast‑freeze drawers, Wi‑Fi temperature alerts and power‑outage notifications. These can protect your batch cooking investment—set alerts and monitor temps during large freezes.
- Reusable and low‑waste packaging: Reusable silicone bags and thicker vacuum bags are more common and cost‑effective over time. They reduce single‑use plastic waste for freezer‑first cooks.
- Home vacuum sealers have improved for convenience and reliability. If you vacuum seal hot or warm foods, follow manufacturer guidance to avoid food safety issues—cool slightly first or use partial vacuum settings intended for moist foods.
- Vegetable scrap stock: Freezing onion peels, carrot ends and herb stems in a resealable bag until you have enough for stock reduces waste and yields flavorful homemade stock—label and use within 3–4 months for best quality.
Common mistakes to avoid
- Skipping blanching on sensitive vegetables (green beans, broccoli): leads to dull color and mushy texture after thawing.
- Packing while still hot: this raises freezer temp and creates condensation/ice crystals—cool briefly (but refrigerate/ freeze within 2 hours) before sealing.
- Over‑seasoning before freezing (especially salt): flavors concentrate—season lightly and finish when reheating.
- Using thin single‑use bags without removing air: leads to freezer burn and off‑flavors. Prefer heavy duty bags or vacuum sealing.
- Expecting raw textures: lettuce and cucumbers won't survive freezing as salads—use greens only in cooked dishes or smoothies.
Pro tips from batch‑cooking professionals
- Flash‑freeze on trays: arrange single layers on baking sheets, freeze 1–2 hours, then transfer to bags—prevents clumping (great for corn, sliced peppers, zucchini).
- Portion sauces into silicone muffin pans and freeze into disks; pop out and bag for single‑serve sauce portions—easy and precise.
- Double‑bag soups and stews, or vacuum‑seal then bag, to minimize freezer burn for longer storage.
- Keep an “acid jar” (lemon wedges or a small bottle of vinegar) in the fridge—adding acid when reheating brightens frozen veg flavors.
- Start small: test one or two batches and note blanching times and texture results; adjust for your household’s texture preference.
Why freezing can be healthy
Frozen vegetables often retain nutrients as well as fresh produce that has been transported and stored for days. A comparative review (Rickman, Barrett & Bruhn, 2007) found that freezing preserves vitamins and phytochemicals effectively compared with fresh produce that undergoes extended storage. The Academy of Nutrition and Dietetics also notes frozen vegetables are a nutrient‑dense, convenient option when fresh is not available. These conclusions remain the basis for home‑freezing recommendations: process produce at peak ripeness and use correct blanching and storage methods to preserve nutrients and quality.
Safety reminders and authoritative sources
Food safety authorities consistently advise refrigerating or freezing cooked foods within 2 hours of cooking (1 hour if ambient temperature is above 90°F/32°C). Reheat leftovers to 165°F (74°C) throughout. For detailed blanching times, altitude adjustments and preservation techniques, consult the National Center for Home Food Preservation (NCHFP). For freezing safety and storage guidance, see USDA Food Safety and Inspection Service (FSIS) and CDC food safety pages.
Sample two‑week freezer‑first schedule (example)
Batch once per week or once every two weeks depending on family size.
- Session A (day 1): Roast 6 lb mixed vegetables (eggplant, zucchini, peppers). Make two 2‑cup portions for dinners and four 1‑cup portions for lunches. Freeze roasted tomato‑pepper sauce in six 1‑cup portions (silicone muffin disks for single portions).
- Session B (day 2): Blanch green beans, corn kernels and peas. Portion into 8–10 mixed stir‑fry bags (1–1.5 cups) with a labeled packet of dry seasoning for the stovetop.
- Session C (day 8): Prepare a vegetable curry base (onions, tomatoes, peppers; add cooked lentils if desired). Freeze in 6 portions with reheating and rice instructions.
FAQ
Can I freeze a cooked dish that contains dairy (cream, cheese)?
You can, but expect texture changes. Creamy sauces and dishes may separate or become grainy after thawing. Reheat gently and whisk or blend to recombine. For best quality, freeze dairy components separately when practical (e.g., freeze the sauce base and add cream/fresh cheese when reheating).
How long should I keep frozen vegetable sauces and bases?
At 0°F (−18°C) food is safe indefinitely, but quality declines. For best taste and texture: aim to use vegetable sauces within 3–6 months and blanched single vegetables within 8–12 months. Label dates clearly and use older packages first (FIFO).
Do I need to blanch all vegetables before freezing?
No. Root vegetables, peas and green beans benefit most from blanching. Many vegetables—peppers, onions, mushrooms, eggplant, and tomato sauces—freeze well after roasting or sautéing without blanching. Refer to the NCHFP for a complete blanching chart and altitude adjustments.
Is vacuum sealing always better?
Vacuum sealing improves quality retention by minimizing air exposure, especially for long storage. It’s particularly useful for sauces, single‑ingredient packs and items you’ll store beyond 3 months. However, vacuum sealing cooked hot foods requires care—cool slightly before sealing or use settings designed for moist foods to prevent bacterial growth and bag damage.
Any special considerations for households with immunocompromised members?
Yes. If someone in your household is immunocompromised, follow stricter food‑safety practices: cool and refrigerate/or freeze cooked foods promptly, reheat leftovers to 165°F (74°C), and avoid any storage beyond recommended quality windows. Discuss specific precautions with their healthcare provider.
Final note: Freezer‑first meal planning is a practical way to stretch seasonal produce, cut food waste and save weekday time. Start with small batches, keep notes on what your household prefers, and adjust blanching or seasoning levels. If you have medical dietary needs (sodium restrictions, allergies), check with a registered dietitian or your healthcare provider before making big batch changes.
Sources: National Center for Home Food Preservation (NCHFP); USDA Food Safety & Inspection Service (FSIS); Centers for Disease Control and Prevention (CDC); Rickman J.C., Barrett D.M., Bruhn C.M., "Nutritional comparison of fresh, frozen and canned fruits and vegetables" (J Sci Food Agric, 2007); Academy of Nutrition and Dietetics guidance on frozen produce. For appliance features and packaging developments, consult product documentation and manufacturer guidance (2024–2026 models).