
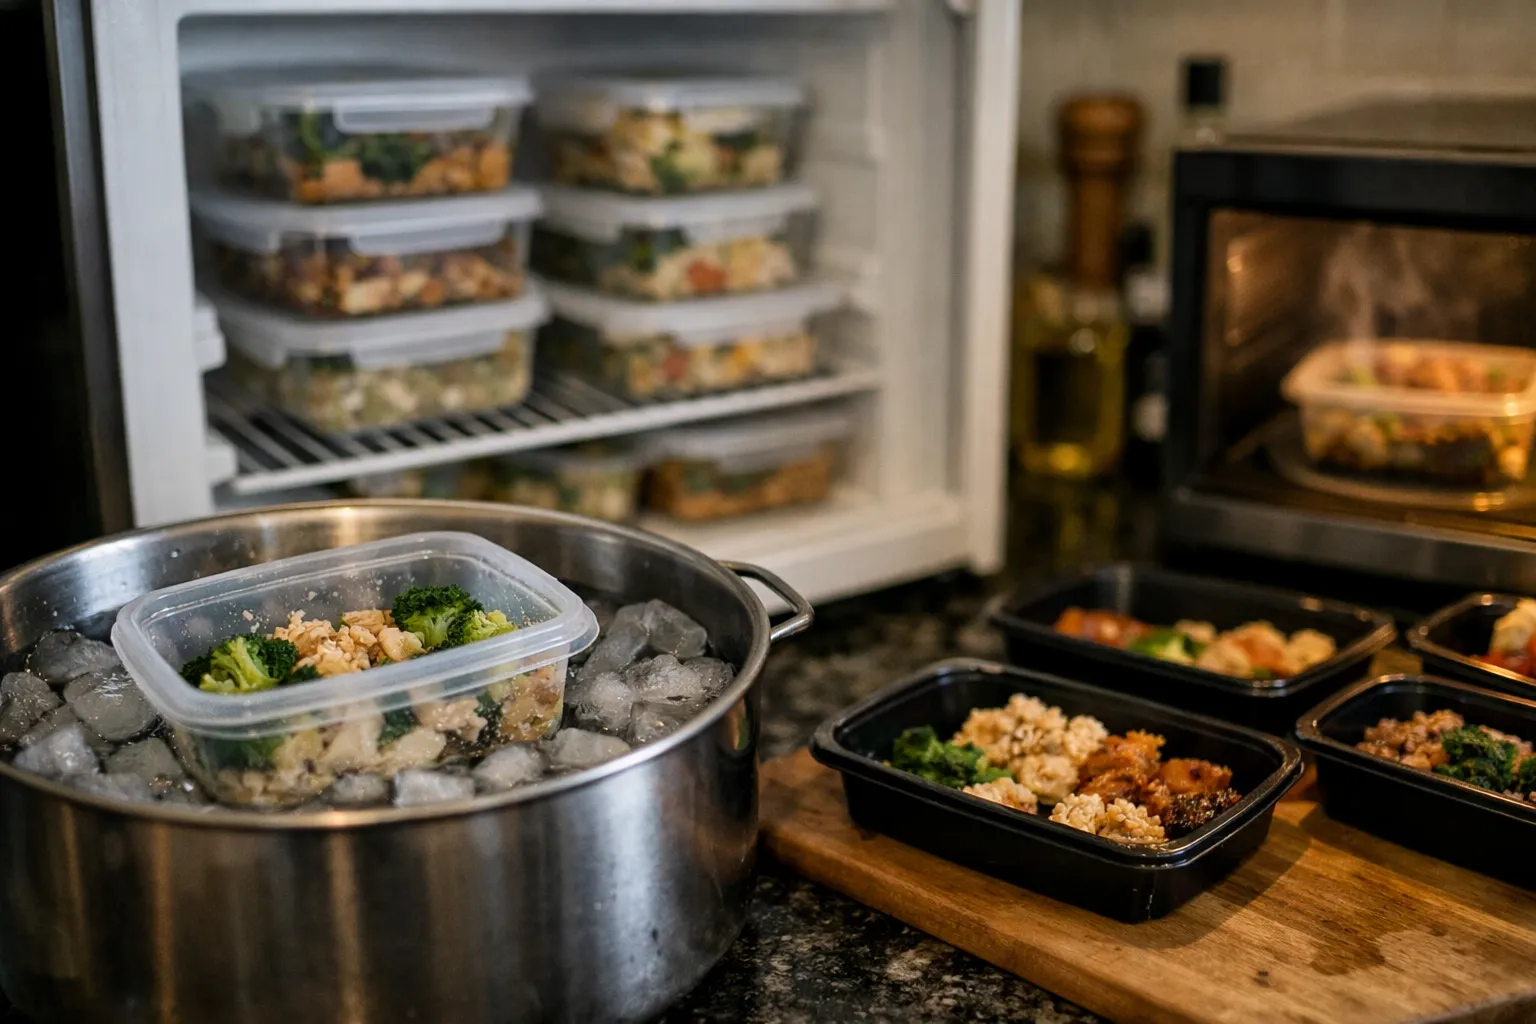
Introduction — What you'll learn and who this is for
If you batch-cook to save time, this updated October 2026 guide tells you exactly how to cool, store, thaw and reheat weekly meals so they stay safe and tasty. This is for home cooks, busy parents, and anyone who prepares multiple meals at once — whether you’re a weekend batch-cooker, a hybrid meal-kit user, or someone experimenting with sous-vide.
By the end you’ll be able to: pick the right containers, cool hot food quickly without commercial equipment, choose fridge vs freezer with confidence, label for rotation, use modern consumer tools (vacuum sealers, smart thermometers) securely, and reheat to safe temperatures. I explain the "why" behind each step so you can make choices that fit your kitchen and risk tolerance.
Prerequisites / Context — What you should know before you start
- Essential equipment: Instant-read digital thermometer (preferably probe-style), shallow airtight containers (glass or BPA-free plastic), heavy-duty freezer bags or vacuum sealer, large mixing bowls or sinks for ice baths, appliance thermometer for the fridge, marker and labels. Smart thermometers and oven probes are useful but treat them like any connected device (see privacy/security notes below).
- Temperature targets (unchanged): Refrigerator ≤ 40°F (≤4°C) and freezer ≤ 0°F (≤−18°C) — USDA guidance. Refrigerate perishable food within 2 hours of cooking (1 hour if ambient temperature exceeds 90°F/32°C).
- Why temperatures matter: Most pathogenic bacteria grow fastest in the "danger zone" between 40°F and 140°F (4°C–60°C). FDA Food Code timing for commercial kitchens remains a useful benchmark: cool from 135°F to 70°F within 2 hours and to 41°F within 6 hours in commercial settings — for home cooks aim to hit under 70°F within 2 hours and under 41°F within 4 hours when practical.
- Common risks: Bacillus cereus in starchy foods (rice, pasta), Clostridium perfringens in large roasts or gravies cooled slowly, and Salmonella/Listeria associated with protein and ready-to-eat items. CDC continues to estimate roughly 48 million foodborne illnesses annually in the U.S.; many stem from improper cooling and storage.
Step 1: Plan your batches with safety in mind
- Group items by storage needs. Plan perishable cooked proteins and rice/pasta separately from low-risk items like roasted root vegetables or preserved salads. This helps you prioritize rapid cooling for the highest-risk items.
- Portion for rapid cooling and single-use reheating. Divide large pots into shallow portions (2-inch/5 cm depth or less). Smaller portions cool faster and reheat more evenly — think of cooling like stopping a heat wave with lots of little umbrellas rather than one big tarp.
- Decide fridge vs freezer by timeline and texture:
- Refrigerate meals you’ll eat in 3–4 days (USDA guidance).
- Freeze anything you won’t eat within 3–4 days; most cooked proteins keep quality 2–4 months, stews and casseroles 2–6 months depending on ingredients.
- Plan for power interruptions and heat waves. With warmer summers and more extreme weather events in many regions, factor in a plan: a full chest freezer holds cold longest, and you should move perishable meals to a cooler with ice for multi-hour outages.
Step 2: Cook to safe internal temperatures
- Use an instant-read thermometer every time. Target internal temperatures: poultry 165°F (74°C), ground meat 160°F (71°C), whole cuts of beef/pork/lamb 145°F (63°C) with a 3-minute rest. Mixed dishes (casseroles, soups) should reach 165°F before cooling.
- Why this matters: Thorough cooking reduces the number of surviving organisms — fewer organisms mean less risk during the cooling window. Resist the "looks done" trap; color and smell are unreliable indicators of safety.
Step 3: Rapid cool — practical cooling methods for home cooks (updated for 2026 tools)
Blast chillers are standard in restaurants, but at home you can apply the same principles: increase surface area, transfer heat to a cold medium, and speed airflow. Recent consumer devices (portable flash chillers and high-power countertop fans) help, but the basics still matter.
- Shallow pans first. Immediately after cooking, split large pots into shallow, uncovered metal or glass pans (≤2-inch depth). Metal transfers heat faster than plastic — use it for the first cooling stage.
- Ice-bath or sink bath for soups and grains. Place the shallow pan into an ice-water bath and stir frequently to break up hot pockets. For rice and risotto, stir gently to avoid a mushy texture — short, deliberate folds break heat while preserving structure.
- Use airflow. After surface steam subsides, place pans in front of a countertop fan to speed evaporative cooling. Then transfer to the refrigerator once surface temperature is below ~70°F (21°C).
- Consumer flash chillers and sous-vide immersion circulators: If you own a consumer-grade flash chiller, follow manufacturer instructions. Sous-vide cookers are excellent for precise reheating to safe temperatures (see reheating section) but are not a substitute for initial rapid cooling of large hot batches.
- When to refrigerate immediately: If you can’t get food under 70°F in 2 hours with the above methods, prioritize refrigerating in multiple shallow containers — moving heat into the fridge sooner is better than leaving a large pot out on the counter.
Step 4: Package and label for safety and convenience
- Choose the right container. Glass (with tight-fitting lids) is durable and microwave-safe; heavy-duty freezer bags and vacuum-seal pouches minimize freezer burn. Avoid single-use thin plastics for long-term storage and never microwave in non-microwave-safe plastic.
- Portion sizes: Pack single-serve or 1–2 meal portions to avoid repeated reheating. Vacuum sealing extends quality in the freezer — useful for fatty or strongly flavored foods.
- Labeling: Mark name, cook date, and safe-eat-by or freeze-by date. Add reheating instructions (e.g., “Reheat to 165°F; stir halfway”) to reduce guesswork and unsafe practices later.
- Digital organizers: If you use a meal-planning or inventory app, log freezer dates there. It’s an extra step but prevents that forgotten container at the back of the freezer.
Step 5: Refrigeration and freezing timelines (practical rules — reaffirmed in 2026)
- Refrigerator (≤40°F / 4°C): Cooked meat, poultry, fish and most cooked dishes: 3–4 days. Salads with mayonnaise or dairy: 2–3 days. Cooked rice and pasta: 3–4 days if cooled promptly.
- Freezer (≤0°F / −18°C): Most cooked meals keep best quality 2–4 months; soups and stews 2–6 months depending on acidity and ingredients. Vacuum-sealed meals retain quality longer.
- When in doubt, freeze: Freezing halts bacterial growth and preserves food. Freeze promptly after adequate cooling to maintain both safety and texture.
Step 6: Thawing safely
- Refrigerator thawing (preferred): Transfer frozen meals to the fridge 24–48 hours before eating depending on size. Keep them on a tray to catch condensation.
- Cold water thawing: Submerge vacuum-sealed bags in cold water and change water every 30 minutes. Cook immediately after thawing.
- Microwave thawing: Use defrost setting and cook or reheat immediately to 165°F; microwaves leave cold spots where bacteria can survive.
Step 7: Reheating — hit the right temperature and pick the right method
- Target internal temperature: Reheat leftovers to 165°F (74°C) throughout. A probe or instant-read thermometer is the only reliable check.
- Reheat once only: Every cool/reheat cycle increases risk and reduces quality. Reheat only the portion you plan to eat.
- Methods:
- Stovetop: Low-to-medium heat, add a splash of broth to prevent drying, stir frequently to eliminate cold pockets.
- Oven: Cover with foil to prevent drying; 350°F (175°C) until internal temp reaches 165°F — good for casseroles and baked dishes.
- Microwave: Stir and rotate, use shorter intervals and check with a thermometer; allow standing time to let residual heat even out.
- Sous-vide reheating: If vacuum-sealed, reheating in a water bath to a food-safe temperature (e.g., 140–165°F depending on the dish) produces even results and preserves texture — but ensure you reach 165°F for mixed dishes or follow manufacturer food-safety guidance for lower-temp sous-vide reheat times.
Example weekly workflow — updated 2026 practical plan
Here’s a Sunday routine that balances safety, modern tools, and plant-forward trends: herb-roasted chicken thighs, turmeric lentil stew, barley pilaf, and roasted winter vegetables.
- Roast 6–8 bone-in chicken thighs to 165°F; remove from pan, carve or portion into 6–8 shallow containers (about 5–6 oz each).
- Cook 4 cups dry barley (yields ~10–12 cups cooked). Spread in a single layer on a rimmed sheet pan; cool in an ice-bath sink or with a fan while stirring gently.
- Portion lentil stew into single-serving vacuum-seal pouches; chill until cool, then freeze or refrigerate depending on plan.
- Roast vegetables on sheet pans; cool briefly uncovered, then seal once steam subsides. Label each container with date and reheating note.
- Refrigerate what you’ll eat within 3 days, freeze the rest. Log frozen meals in your app or on a paper list on the freezer door.
Common mistakes to avoid
- Putting a large pot in the fridge whole. The center stays warm too long — split into shallow pans instead.
- Relying on smell or appearance. Spoilage and pathogenic bacteria often give no obvious signs. Follow time and temperature rules.
- Reheating the whole batch repeatedly. Always reheat single portions.
- Ignoring fridge temperature and maintenance. Many home fridges run warmer than their dial indicates — check with an appliance thermometer monthly and service seals and coils if temperatures drift upward.
- Assuming vacuum sealing makes unsafe food safe. Vacuum sealing slows oxidation and freezer burn, but it does not reverse improper cooling or destroy pathogens — cool first, then seal.
Pro tips — small investments that pay big dividends (and a privacy note)
- Buy a reliable instant-read thermometer ($20–$40). It’s the single best safety gadget for home cooks. Probe thermometers with a clip and alarm are very convenient for reheats.
- Use shallow stainless pans for the initial cool-down. Metal drops heat faster than plastic or glass in that first critical window.
- Vacuum sealers for freezer meals. They improve shelf life and prevent freezer burn, especially for fatty foods. Label every pouch with date and contents.
- Adopt a rotation rhythm: Eat refrigerated meals within three days; rotate frozen meals into the fridge weekly so nothing sits forgotten for months.
- Keep a “reheat kit” in the fridge. Small jars of olive oil, broth concentrate, lemon juice, and fresh herbs help revive meals without overcooking during reheating.
- Smart devices and privacy: Smart thermometers and connected fridges add convenience (alarms, logs, remote checks). Treat them like any IoT device: change default passwords, keep firmware updated, and limit sharing of account access. If you use cloud logging for meal temps, consider what personal data (timestamps, patterns) you’re comfortable sharing.
Why this matters — the practical payoff
Safe meal-prep reduces food waste, saves money, and lowers the risk of foodborne illness. Apply the steps above and you’ll protect the time you invest in cooking: fewer ruined meals, fewer takeout emergencies, and fewer sick days. The marginal effort of a 10-minute cooling routine and a thermometer check pays for itself in consistency.
FAQ
How long can I keep cooked chicken in the fridge?
Cooked chicken is safe in the refrigerator for 3–4 days at ≤40°F (4°C). If you won’t eat it within that window, freeze portions after cooling. Always reheat to 165°F before eating.
Is it safe to reheat rice and grains?
Yes, but rice and other starchy foods are prone to Bacillus cereus if cooled slowly. Cool rice quickly in shallow layers, refrigerate within 2 hours, and reheat to 165°F. Discard rice left at room temperature for more than 2 hours.
Can I refreeze thawed meals?
If food was thawed in the refrigerator and stayed ≤40°F, you can refreeze it, though texture and quality may decline. If you thawed using cold water or microwave, cook immediately and only freeze leftovers after cooking.
What if my power goes out — how long is my food safe?
Keep fridge and freezer doors closed as much as possible. A full freezer can keep food safe for ~48 hours (24 hours if half-full) if unopened. If fridge temperature rises above 40°F for more than 2 hours, perishable items should be discarded. When in doubt, throw it out.
Are smart thermometers worth it?
Yes for frequent batch-cookers: they provide alarms, logs, and remote checks that reduce guesswork. But secure them: change default passwords, update firmware, and be mindful of what data you allow app developers to collect.
Sources: U.S. Department of Agriculture (USDA), Centers for Disease Control and Prevention (CDC), FDA Food Code, and established food-safety consensus for home cooks. Recommendations reflect standard public-health guidance as of October 2026 and practical best practices used in consumer kitchens.